WDL’s Audacity Guide
Installing
- All relevant links for downloading the program can be found here.
For Windows:
- Download Audacity for Windows 10/8/7/Vista (XP support has been dropped)
- Download the “Audacity 2.3.3 zip” file.
- After downloading these files, you should be able to open the “Audacity” file and the program should start right away.
For mac OS:
- Download Audacity for mac OS X/macOS 10.7 to 10.14 (Audacity does not support 10.15, Catalina, or the most recent update)
- Download the “Audacity 2.3.3. dmg” file.
- After downloading these files, you should be able to open the “Audacity” file and the program should start right away.
Important Notes:
- It’s a good idea to download “LAME Encoder”, in case there are any problems installing the Audacity program.
- All of the computers in the Paul Robeson Library, or the Digital Commons, have the program already installed.
Recording
- Before recording anything, make sure you create a folder. Put your Audacity file in the folder, and call it “audacity_title of your project“
- If you are using the Blue Snowball, open Audacity and change “Built-in Microphone” (next to the microphone picture) to Blue Snowball.
- If this doesn’t show up on your computer, go to “Finder”, then “Sound”, then “Input”, and then there should be the option to select Blue Snowball, (sometimes you have to click “Show Volume” in the menu bar).
- When you go back to “Built-in Microphone”, Blue Snowball should now be an option. It’s best to use a microphone, but if you don’t have one, make sure you go to a quiet place to record.
- Before you record, wait five seconds. This is to make sure you can cut out any background noise that can be heard.
- It’s also important that the buttons on the top left corner (in order: “Pause”, “Play”, “Stop”, “Skip to Start”, “Skip to End”, and “Record”) all help in the recording process. Once you click “Record” and you’ve finished, make sure to click the “Stop” button. If you would just like to stop for a brief time and gather yourself, click the “Pause” button. Once you click “Play”, the recording will still continue.
Editing
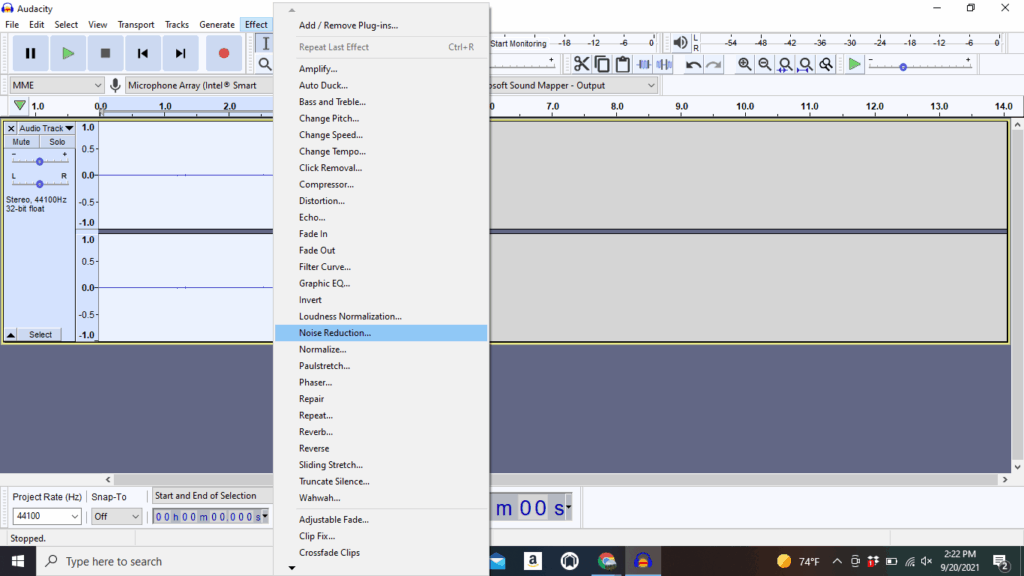
After you are done recording, select the first five seconds of silence on your track. Then click “Effects”, then “Noise Reduction”, then “Get Noise Profile”.
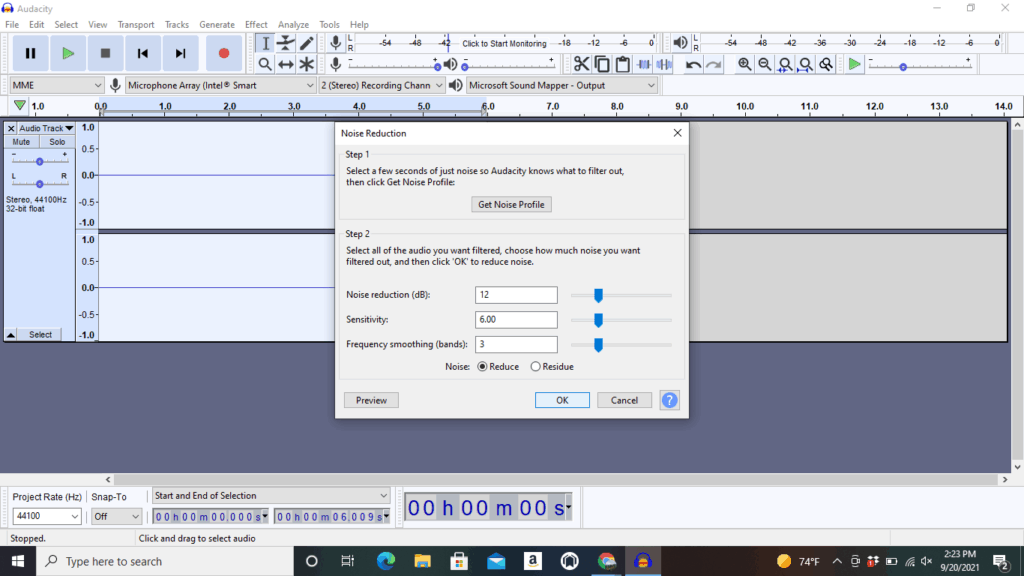
Then, select all the audio on that track and go back to “Effects”, then “Noise Reduction”, then click “OK”. After this, the beginning section should be quiet, and the track should sound more clear.
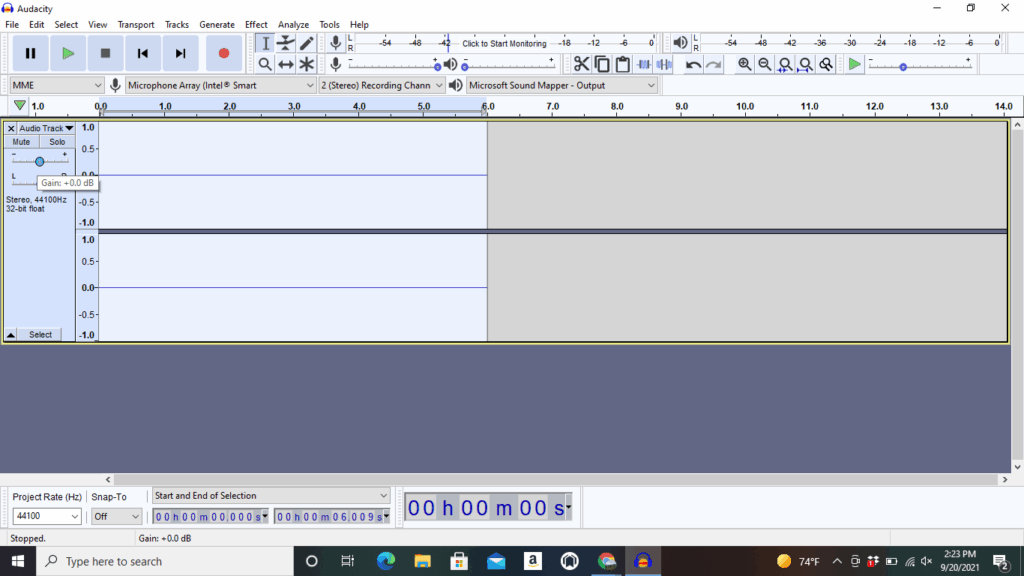
After this, cut out the first five seconds of silence.
If you feel your audio track is too loud or too quiet (depending on if your playback meter hits the red, or if it’s too low in the green) you can adjust the volume on the left of the audio track.
There is a bar (all the way to the left of the “-” symbol, and to the right is the “+” symbol) where you can adjust what sounds good for you. It’s a good idea to listen to this audio with headphones on, to hear everything more clearly.
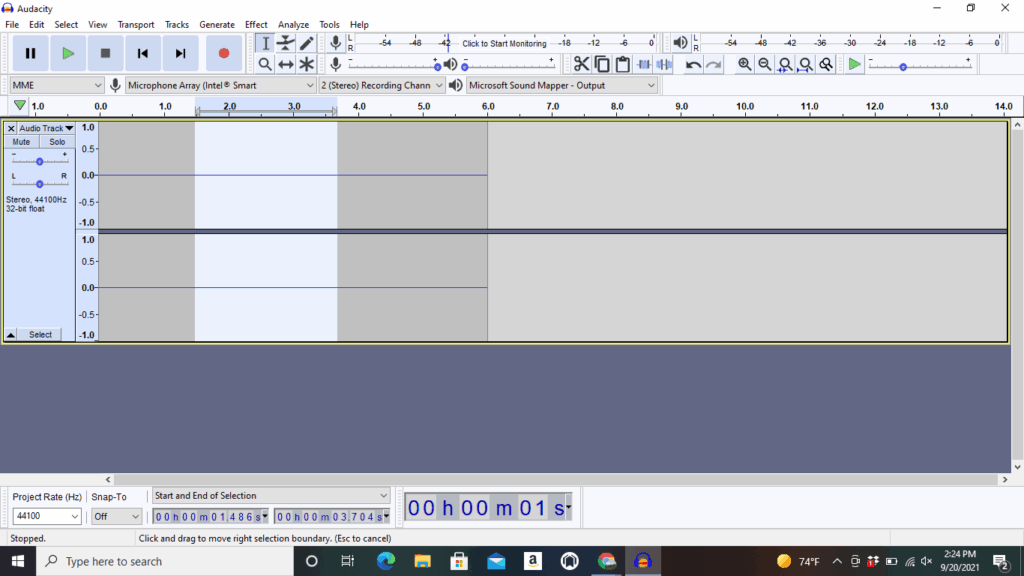
To delete any audio you don’t want in your recording, or if you’ve made a mistake, you can select what audio you want to cut out (by clicking the “I” symbol on the top screen and then dragging the audio you’d like to select) and click the “Delete” button on your keyboard. You can also choose to click the button with the scissors to delete a section as well.
If you want to move your audio and place it somewhere else, click the line with the two arrows on both sides.
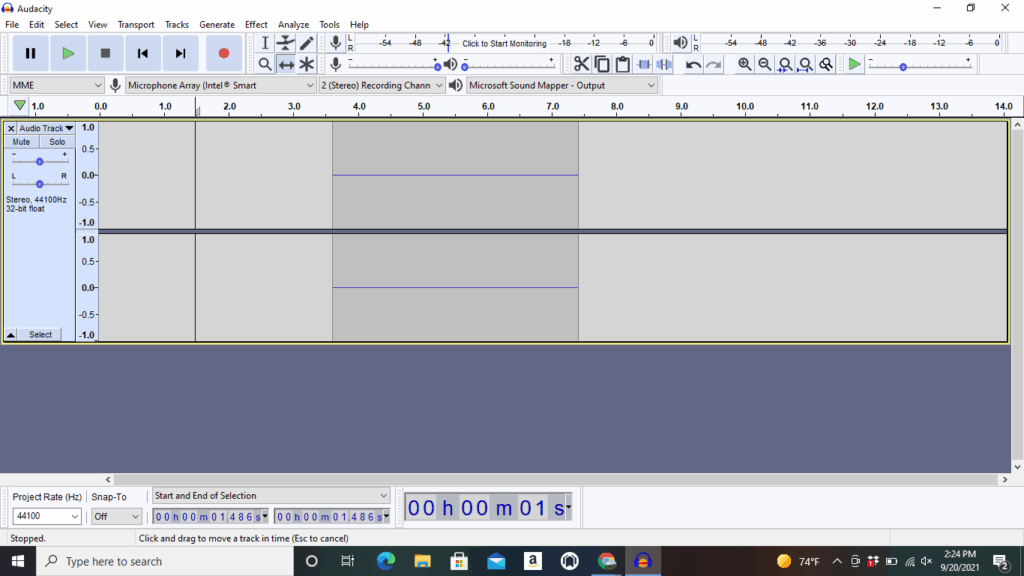
It’s also important to note that you cannot use any of these functions while the “Play” button is on. Click the square button to stop the audio.
Music
You have many different options for uploading music to Audacity. A great place to find music is the Free Music Archive, where you can choose music based on genre. There are tons of options to select from, whether you’re looking for something upbeat, or looking for something slow.
To download this, click the audio you want and go all the way to the right, where there is an arrow facing down. Once you click that arrow, click the tree dots, where you then have the option to download. Once you are done, drag and drop to your folder.
Another great place to go is the Youtube Free Music Audio Library. There are different audio selections, whether you’re looking for something dependent on mood or genre. To download this audio, open another tab.
Type “youtube mp3 download” and click enter. There are a few different options to use while downloading the music. Two great options are either YTMP3 or FLVTO (which should be the first two websites to pop up).
Copy and paste the link to the music you would like to download, and paste it to the link. Then, click “Convert” and download.
The music should download right away onto your computer (it will most likely bring you another link, but you can just close out of it right away).
Then, drag and drop the music to your folder.
Once you have your music, click “File”, then “Import”, then “Audio”, then select the music in your folder.
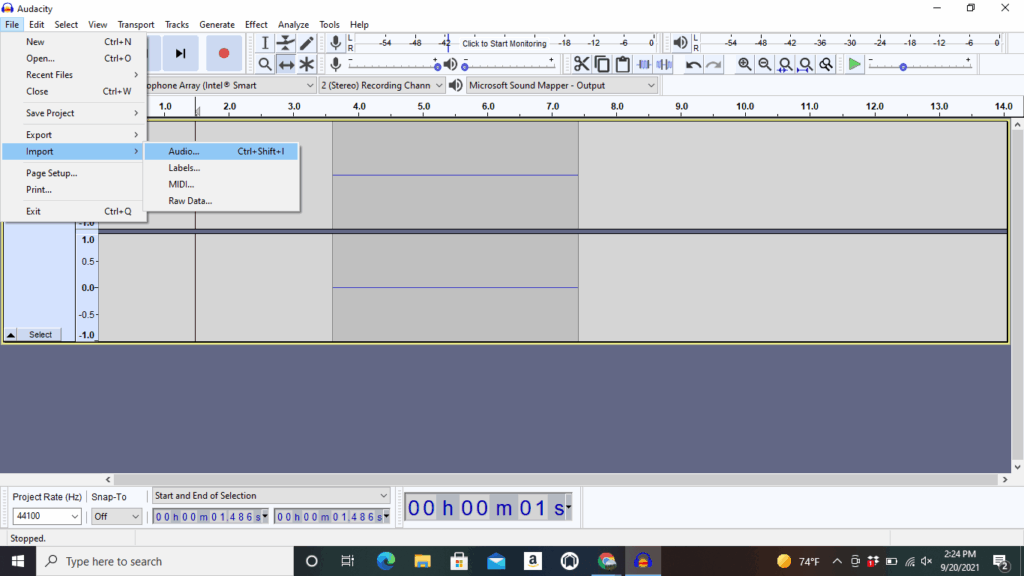
The music will most likely be louder than your recording, so on the left side of the track, you can adjust your volume (just like you would do with your recording) to around the “-” symbol. Each track is different, so just make sure to listen with headphones to get the best sound.
Effects
Usually, the best effects on Audacity are the simplest ones. The simple “fade in and fade out” effect is my personal favorite, and it’s great for music.
To use this effect, simply select the track and go to “effects”. Then, either elect “fade in” or “fade out”, and the audio will automatically fade in or fade out.
There are a variety of other effects to choose from, and we recommend experimenting with different options to find something you really like, especially if you’re working on a more abstract audio project, or you have an idea in mind for how you want it to sound.
Saving and Exporting
You must save throughout your entire project. There is always a chance for the application to stop working.
To save, click “File”, then “Save Project As”, and then choose the name of your file. Professors often have a particular way they want to save your project, so make sure to look at the syllabus to see what the professor is looking for.
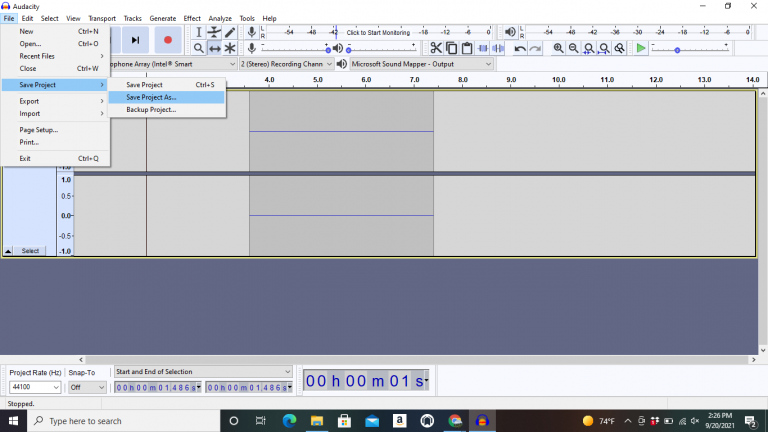
Then, save the file to your folder that is located on your laptop. As you save after you’ve done this, click “File”, then “Save Project”.
Once you are done and ready to turn in the project, you are ready to export.
To do this, click”File”, then “Export”, and then “Export as WAV”. Normally, it is easier to export just as an MP3 file, but because of technical difficulties in the past, I’ve found it easier to do things this way.
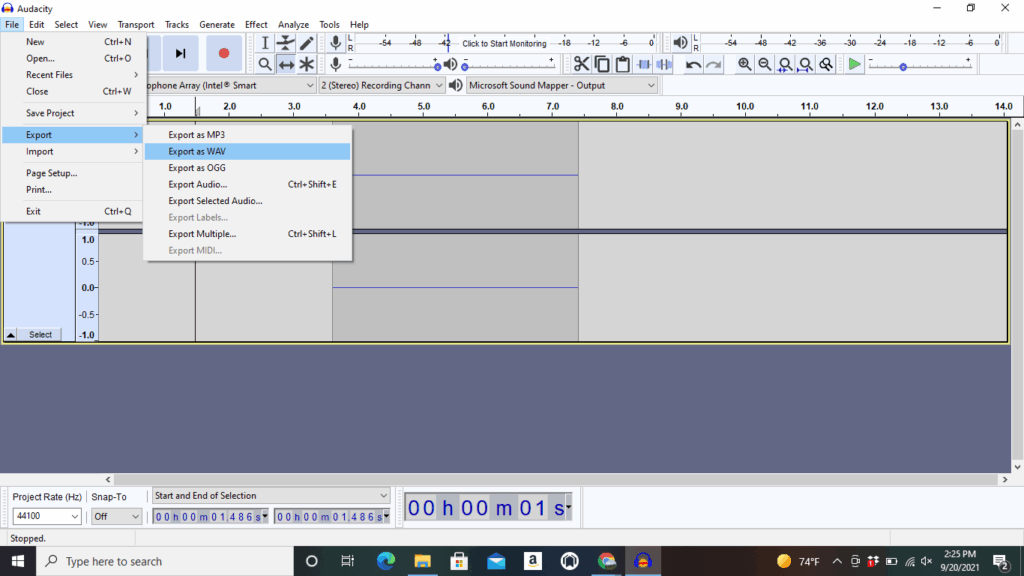
Save this file to your folder and then wait until it’s done.
Once it is done exporting as a WAV file, search online for a “WAV to MP3 converter”. I usually just click the first one that pops up online, which should be Online Audio Converter.
For this particular website, first click “Open Files” and click the WAV file.
After this file loads (it could take some time), you then convert these files. Once this is done, you should have the option to download the file.
This should download as an MP3 file. I would then add this file to your folder.
To make sure you don’t lose these files, I recommend downloading the MP3 file on Google Drive or put it on a flashdrive. This makes sure everything is safely secure before you turn it in. Professors will either have you email it to them or upload in the dropbox on Sakai.
